Saturday, November 2, 2013

Summer 2013

So it's been a long time since I've updated anything -- I have to admit to being busier than ever, but I'd like to at least try to keep track of things a little bit!

Over the summer I had the amazing opportunity to work for Marianne Korstyne at Krostyne Studio here in Pittsburgh. Marianne is an amazing draper/shop owner who also teaches as an adjunct professor at CMU for various costume production classes.  During my time at her studio we made leather corsets, a fat suit and costume to fit (trousers and a vest and coat), tyvec dance-wear, and 30s wedding gowns, to mention a few. I learned so much while there and improved on my sewing skills greatly. It was a wonderful experience!


Fall front breeches


Wedding gown mock-up -- I got to pattern the sleeve!

Wedding gown mock-up

Thursday, May 16, 2013

Final Crit -- Spring 2013

Year two is done! I'm looking forward to a restful and productive summer and then the start of my third and final year as a masters student!


Tailoring -- complete!

I also finished my vest and trousers for Tailoring class. Again, I'm very happy with how everything turned out -- I think Matt looks quite dashing! I'm very pleased with the trousers -- everything went very smoothly. I had to try putting in the fly a couple of times, but I think I understand how it all works now. The vest, in general, went smoothly. I hit a snag with the collar. I think that in the chaos of the term, when I was doing my pattern corrections, I never ended up truing the collar to the body of the vest. Can't believe I forgot to do that somehow! At any rate, the collar just wasn't quite long enough to get where it had to, so I ended up adjusting the pattern and just re-making it. Once the collar was fitting and on I hit another snag. I had clipped the facing a bit too far at the notch. Again, so frustrated about this! So, as I did and do not have time to go back and re-cut and hand stitch the facing in again, I had to settle for a lapel that just doesn't quite sit right...again, I've learned my lesson.

On the whole though, I'm feeling like I understand collars, notches, and lapels a whole lot better having struggled through this. So, next time collar, I'm going to show you who's boss!


The Amphibian Unitard -- complete!

I finally finished the amphibian unitard! Yay!

So, to summarize the whole process:

1. Patterned the unitard -- I checked all the measurements in comparison to the dress form I was using and to the unitard I had already made to make sure the ratios looked correct. I draped a hood pattern and melded that with the unitard to create a hooded unitard.

2. Dyed the fabric -- I dyed the white miliskin a neon green and dark blue. For the green, I mottle-dyed the fabric with blue and yellow, using shibori and selective dipping of the fabric. I then over-dyed the whole thing with florescent yellow. The dark blue/green is a combination of navy blue, turquoise, and green...it all got a little too dark, but I think it's fine.

3. Silicone-spotted the blue pieces -- At first I just made sheets of fabric with silicone...then I found that it was way more efficient and controllable to cut out the pieces and then silicone them instead.

4. Stitched the unitard together to make sure it fit and to place spots.

5. Basted on foam. Basted one layer of miliskin over the foam and finally basted the silicone-decorated material over that.

6. Took unitard off the form -- took out basting stitches so that unitard could lie flat.

7. Machine-appliqued the dots into place using a walking foot -- this was extremely challenging! I had to use the walking foot or it just didn't move, but fitting everything under that foot as well as the machine was probably one of the most exhausting things I've sewn!

8. Stitched the unitard back together.

9. Inserted invisible zippers at the shoulders

10. Stitched on the hood.

11. Prepped the sleeves with thumb-gloves.

12. Stitched on the sleeves.

And there you have it! A great learning experience building something completely from the bottom up. I had a lot of fun making this and I'm really happy with how it turned out! And thank you to David for being an awesome model!


Saturday, April 13, 2013

Stretch Class: Final Project

As the end of the year is approaching, I've begun my final project in stretch techniques. I am making a unitard that will incorporate padding to create unique shapes and forms. This unitard is a full body one, including a hood.

So far, I've patterned it out, dyed the fabric, and basted it together to do a quick check on fit and to figure out the padded section patterns.

The base fabric is mottle-dyed/tie dyed a bit. I began with blue and yellow and then over-dyed the whole thing with fluorescent yellow to get more of a punch. The bulges are going to be in a darker blue/green color and will feature pebbling done with silicone caulking, which we did during fabric modification last year. I'm so excited to be bringing different techniques together!

Original Concept Sketch

Pebbling in progress
Pebbling Sample 1 w/ blue foil


The unitard fit well on the form I had made it for. I also had a thought -- I bet it would fit my friend who seemed to be about the same size. I took his measurements and compared -- pretty close! So, on a whim I did a quick fitting on him as a test...The only thing I found to alter was the arm which is a bit too large. Yay! Always cool to see what the garment does on a real person vs. the dress form. I also got to mark where to put the padding so that it corresponds better with musculature.


Mock-up Hood
So that's that for now. Next steps are to finish the pebbling so that I can make the hood and padded pieces. I need to pattern the padded pieces as well for both the foam and the stretch. I then need to take my basting stitches out and baste on the foam. I can then stretch the fabric over the foam and applique it on. Once this is finished, I just need to put it all back together, finish the edges that need finishing and put in the zippers! (There will be two zippers coming up from the shoulders and going up to the face).

Thursday, March 14, 2013

Spring Awakening 4

More Photos!


 And so, Spring Awakening has finished! And, once again, I've learned so much! I am quite happy with how everything turned out. Of course I always get a bit frustrated with my sewing, but I know that the more I do this and practice and learn how things come together, the better it will get! For a first Victorian gown, I think it's pretty good!

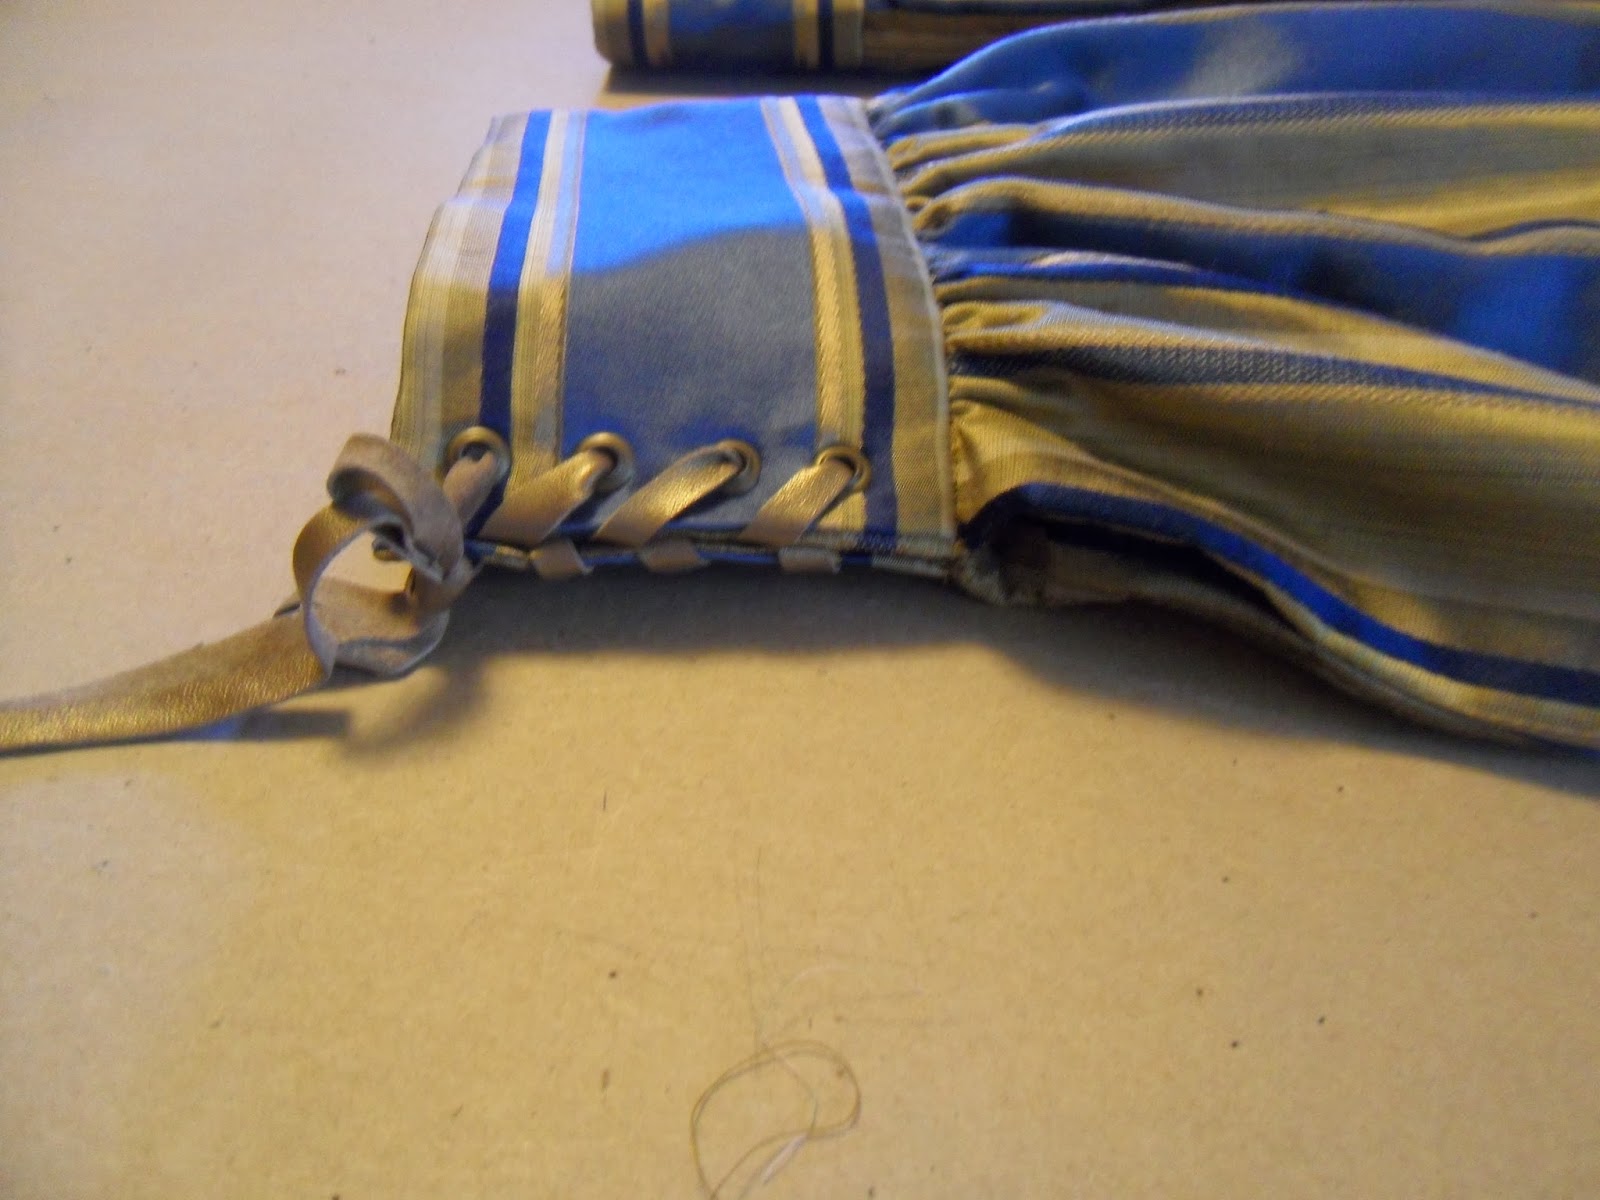
The main thing I would change in looking back is the center front -- we needed a zipper opening as I wrote before, but it all looks a bit off center. The zipper is centered, but because it is a lapped zipper, the stitch line is off center. Especially with the thick fabric used in the front panels, I think it would have been better to off-set the zipper a bit in order to compensate.

In speaking with one of my professors, I learned that the puckering in the front can be caused a number of things: Seizing up in the because of the cording, a bone that is not quite long enough, problems in the flat-lining. Because this only seems to be happening on one side, we decided that it is most likely the cording...and thinking back, this was the side where I had to re-try putting on the cording a couple times before I got it right....so there ya go!

The rippling in the back is probably caused by the bones being a tad bit too short...I'm not entirely positive, but this seems likely. I learned that you can stitch across the bottom of the bone casing to keep everything secure and in place...seems pretty obvious, but I didn't think of it, so it's good to note for next time!

Though I like the pleating in the back, I liked it better in the muslin...different fabric, different behavior. I think for the silk I should have worked a bit more on the angle of the pleats. As it was, I didn't have enough length to work with it more. Again, live and learn!

Interesting note: I was worried that the sleeves were a little too tight, but we decided it was ok. After the first dress rehearsal the actress was actually a little bruised in the crook of her arms from the sleeves! I felt awful!! But, apparently the combination of the tension there and the type of fabric -- this fabric is thick, strong, and holds a fold-- created enough pressure to bruise. In a different kind of fabric this would have been fine. Crazy! So, I opened up the sleeves a bit to create more room and all was well. Just something interesting and unexpected...and a crazy demonstration of the power of fabric!

The costume looked great on stage -- everything seemed to move nicely. Things to be happy about, things to work on and lots learned! All is good!

Friday, March 8, 2013

Masks!


After finishing the latex mask (photo soon to come!), we worked on two more mask types: paper mache and thermo-formable. Both were started with a clay sculpt, just the same as the latex mask. The paper mache mask was built directly on the clay sculpt. We sealed the clay with a spray shellac and then began covering it with layers of paper mache. (50/50 water and white glue).


Once there were about 5 layers of paper mache, we cut the mask in two to get it off the form and then sealed it back together. After about 5 more layers, it was set to be painted. 


Thermo-formable mask:


 We covered the thermo-formable plastic with leather and then painted it with leather dye and lined with felt.